The Best Practices for Maintaining Your Kayak Rack
Key Takeaways
- Regular cleaning to prevent corrosion.
- Check all components and hardware for wear.
- Use protective covers when not in use.
- Store your rack properly to prolong its life.
- Consult the manufacturer’s instructions for specific maintenance tips.
Maintaining your kayak rack is essential to ensuring it remains in excellent condition and serves you well through many outdoor adventures. Proper care can significantly increase the lifespan and functionality of your kayak rack, making it a worthwhile effort. In this guide, we’ll walk you through the best practices for keeping your kayak rack in top shape, including cleaning, inspection, and storage tips.
Why Maintenance is Important
Kayak racks are exposed to a variety of weather conditions and can experience significant wear and tear over time. Without proper maintenance, rust, corrosion, and physical damage can occur. Here are some reasons why maintaining your kayak rack is crucial:
- Prevents costly repairs or replacements.
- Ensures secure transport of your kayak.
- Maintains the aesthetic appearance of your gear.
Cleaning Your Kayak Rack
Cleaning is the first step in keeping your kayak rack well-maintained. Here’s a simple cleaning routine to follow:
- Gather Your Supplies: You’ll need mild soap, water, a sponge or scrub brush, and a microfiber cloth.
- Wash the Rack: Mix soap with water and scrub the rack thoroughly to remove dirt and debris.
- Rinse: Use clean water to rinse off all soap residues.
- Drying: Wipe everything down with a microfiber cloth to prevent water spots.
Inspecting Your Kayak Rack
Regular inspections can help identify any potential issues before they become significant problems. Follow these guidelines:
| Component | What to Check | Frequency |
|---|---|---|
| Mounting Hardware | Check for rust and tightness. | Monthly |
| Crossbars | Inspect for dents or damage. | Monthly |
| Locks & Security Features | Test for functionality and rust. | Every 6 months |
| Rubber Seals | Ensure they are intact and clean. | Every 6 months |
Protecting Your Kayak Rack
During off-seasons or when not in use, it's essential to protect your kayak rack from the elements. Here are some effective methods:
- Use a Protective Cover: A cover can shield it from rain, snow, and UV rays.
- Store Inside: If possible, store the rack in a garage or shed when not in use.
- Keep Off the Ground: Elevating the rack off the ground can help reduce chances of rust.
Installing Your Kayak Rack Correctly
Proper installation is crucial for the performance and longevity of your kayak rack. Make sure to follow these installation tips:
- Refer to manufacturer's guidelines for specific installation instructions.
- Ensure all bolts and connections are securely tightened.
- Verify that the rack is installed on a stable and flat surface.
Recommended Kayak Rack Products
To help you choose the best kayak rack, here’s one of our top recommendations:
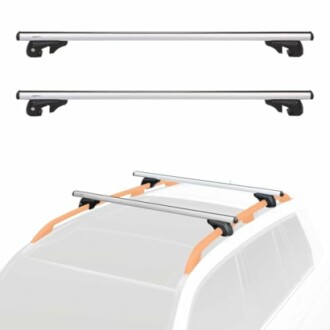
Amazon Basics Cross Bar Roof Rack
This 52-inch crossbar roof rack is versatile, supporting kayaks, snowboards, bikes, and luggage. With a load capacity of 165 lbs, it’s a great choice for outdoor enthusiasts.
Learn MoreConclusion
With the right maintenance practices, your kayak rack can last for years, providing you with reliable support for all your kayaking adventures. Through regular cleaning, inspections, and protective measures, you can ensure your kayak rack remains in top shape. For more tips and guides on kayak racks, check out our resources on kayak racks and buying guides.

